
Facebook Messenger Chat
Easily integrate Facebook Messanger Chat with your Magento 2 web store.
- Simple integration with your store
- Choose Magento page type for Chat display
- Customize Chat layout color
- Set default welcoming Chat message
If you are interested in Facebook ChatBot, please contact us here.
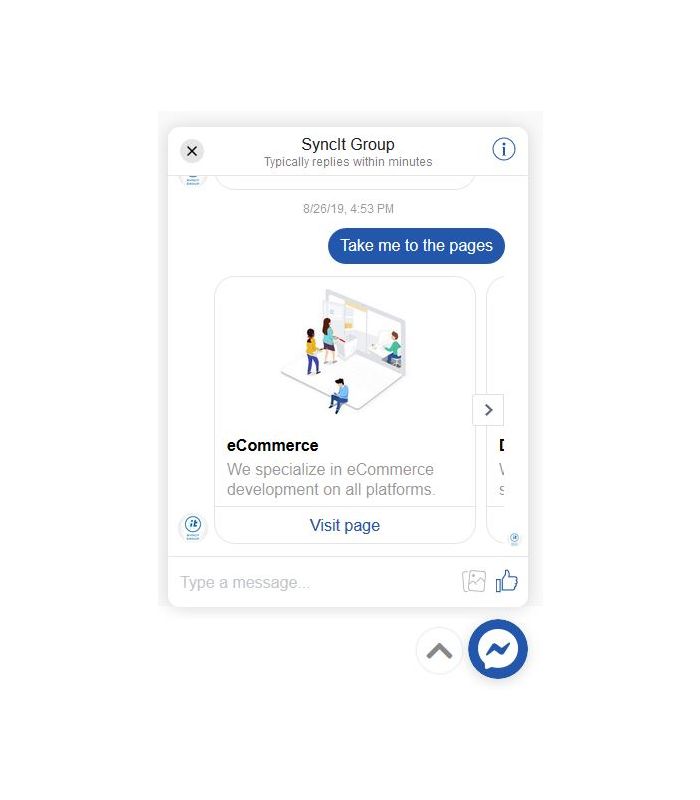
Snapshot of Facebook Messenger Chat

Product Description
Facebook Messenger Chat Extension for Magento 2 is a great tool for connecting your Web store with your brand’s Facebook page. The extension makes it easier for customers to interact first with a Facebook admin in order to get all the information and help they need.
With a simple set-up, you can create a unique look of your Chat, altogether with custom greeting messages. Choose the color of the Chat icon that matches the color of your brand’s logo and it will fit in with your website perfectly. Write an original greeting that will kindly invite your customers to ask for your help. Use the 80-character limit wisely to convey your message in an original manner.
Choose the type of Magento page to display your Chat on. It can be shown on your Homepage and Category page or any other CMS page such as About Us, Terms of Service, and not shown on other pages such as Product page, Cart & Checkout - if you’d like to remove distraction from the purchasing funnel.
Adding this more than useful feature to your website is a big step towards a greater functionality of your Web store. What is more, the Facebook Messenger Chat Extension is sure to provide seamless user experience, help you increase customer loyalty by integrating the popular FB Messenger with your website.
Use Case
Facebook Messenger Chat Extension enables a personal connection with your customers and the platform they are already familiar with. Providing your customers with fastly solutions to their problems accounts for the best possible store experience.
Configuration
In order for the extension to work properly, make sure to follow all the steps listed below.
Step 1 - Install the Extension
First, you have to install the extension in Magento 2. Should you need some help with the installation, you can find it in MagentoDevDocs.
Step 2 - Magento 2 Configuration Settings
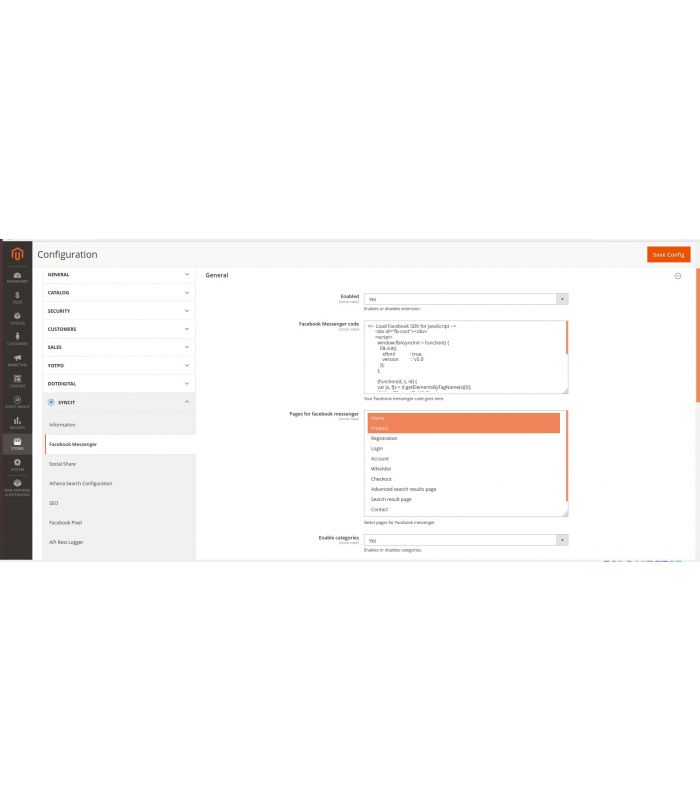
To start with, please follow the path from the admin panel: Stores > Setting > Configuration.
Then, choose the store view in which you would like to use the extension by clicking on “Default Config” in the top left corner of the page, next to Store View.
In the menu on the left side of the page find the extension “Facebook Messenger Chat” and left-click on it.
To enable the extension for the selected store view, choose “Yes” next to “Enabled”.
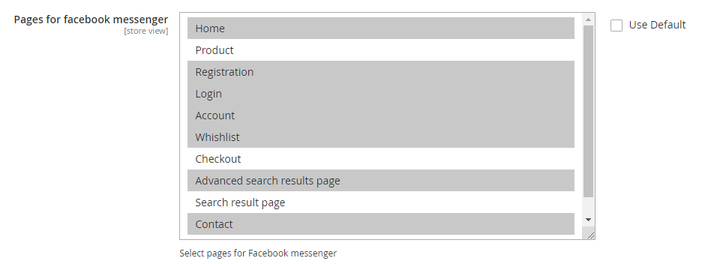
Then select the pages where Facebook Messenger Chat will be displayed by clicking on them next to “Pages for Facebook Messenger Chat”.
Note: If you want the extension to be shown on every page of your Web store, click on “Use Default”.
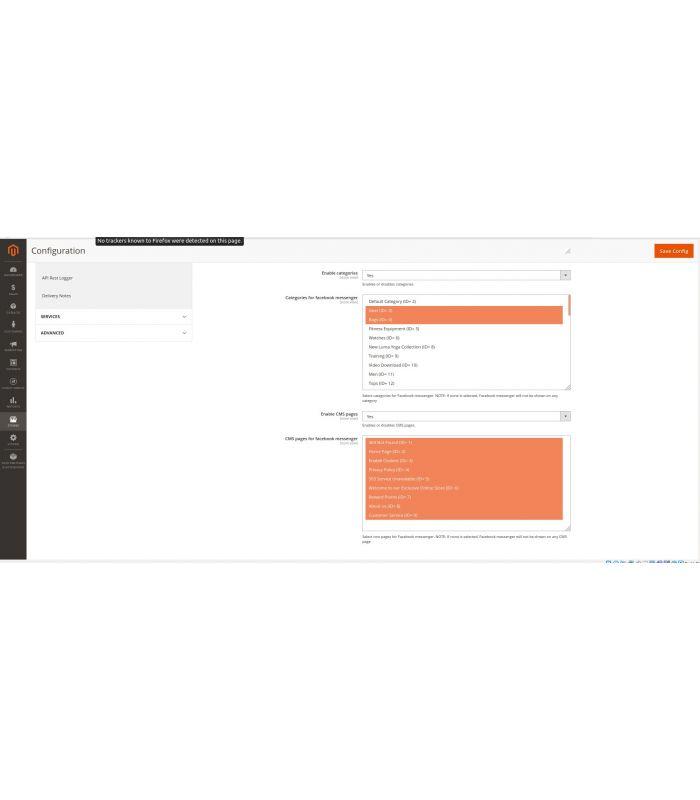
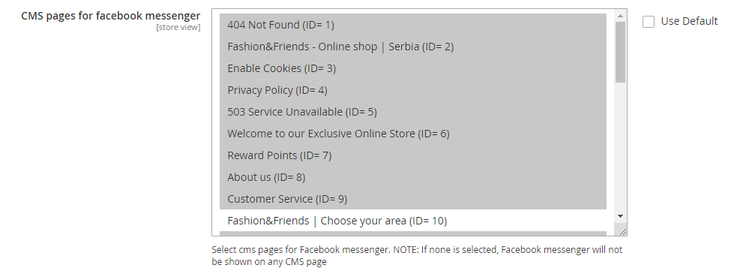
For “Enable Categories” choose “Use Default” and for “Enable CMS Pages” choose “Yes”.
Then, click on the CMS pages on which the Chat is going to be shown.
Note: If you want the Chat to be shown on all the CMS pages, click on “Use Default”. If you do not choose any pages, the Chat will not be shown on any CMS page.
Lastly, you should get the Facebook Messenger code from your Facebook page and copy it in the field next to “Facebook Messenger code”. In the following section, the whole process of Facebook settings will be described.
Step 3 - Facebook Settings
First, go to your Facebook page and click on “Settings”. Then, on the left-side menu click on “Messaging”. Scroll down and find the “Add Messenger to your website” section and click on the “Get Started” button.
Step 1
Within the first step, you can choose the default language from the drop-down menu.
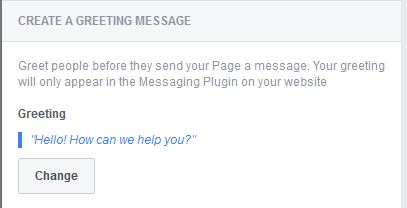
Then, you can write a custom greeting that will be shown as soon as a customer clicks on a chat icon. Just click on the button “Change” and type in the message. Keep in mind that you can use up to 80 characters for the greeting.
You can preview your changes on the right side of the window, as shown in the picture below.
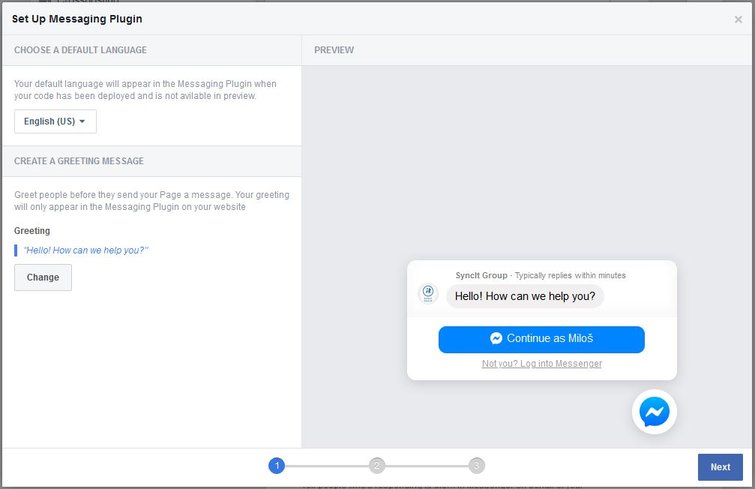
When you are done with step 1, continue with the settings by click on the button “Next” in the bottom right corner.
Step 2
Within the second step, you can change the appearance of the chat icon and chat window. If you set custom colors to “Off”, the colors will match the Facebook appearance.
If you set the custom colors to “Yes”, you can choose one of the displayed colors or you can type in the hex color code of the desired color in the field. Here are some of the basic hex color codes:
- #000000 - black
- #808080 - grey
- #654321 - brown
- #ff0000 - red
- #00ff00 - green
- #0000ff - blue
- #ffff00 - yellow
- #800080 - purple
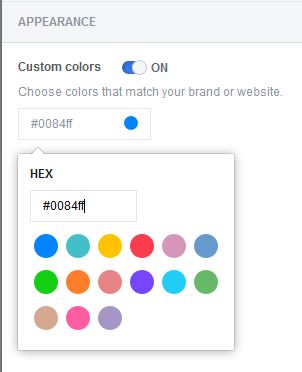
You can see the changes that you have made in the preview box on the right.
When you are done, click on the “Next” button to proceed to step 3.
Step 3
To add a website domain name, you must enter it in the box shown in the picture below and click on the “Save” button.
Then, you can choose between installing the code by yourself or emailing the instructions to your developers by clicking on one of the options from the image below.
Note: Should you choose the second option, you must enter an email address to which the instructions and the code will be sent.
If you are installing the code by yourself, you should click on the “Code Snippet” box on the right in order to copy the code to the clipboard.
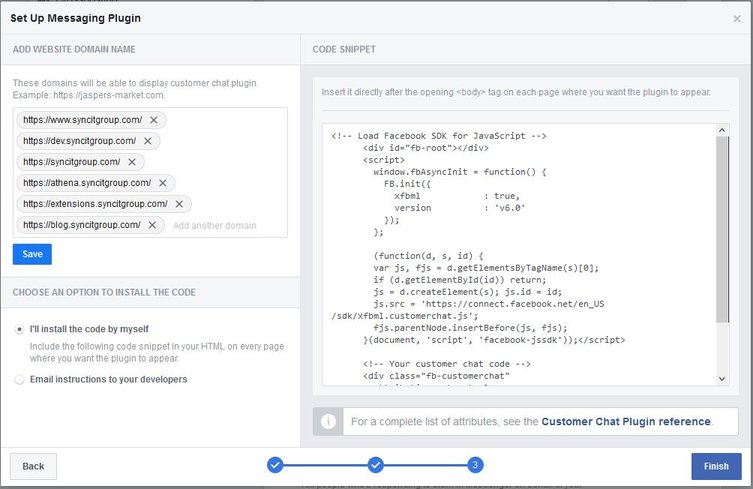
When you are done, click on the “Finish” button in the bottom right corner.
Now go back to Magento and paste the code in the box next to “Facebook Messenger code”.
When you are done entering the code and selecting all the wanted options, click on the “Save Config” button in the top right corner of the page.
Tech Specifications
Compatibility
Magento Open Source, Magento Commerce, Magento Commerce Cloud B2B
Magento version
2.0, 2.1, 2.2, 2.3.0, 2.3.1, 2.3.2, 2.3.3, 2.3.4
Update cost
Free lifetime updates
Support period
3 Months Free Support
Updated
November 27, 2019
Customer Reviews